Pimp My TextMate
How to TextMate like a real baller.
Yo dawg, I herd you like coding…
TextMate is the editor of choice for many Mac developers, from ruby to javascript and beyond.
For our web projects, it’s a natural choice because of how easy it is to switch contexts.
One of TextMate’s largest strengths, however, is how extensible it is.
This guide rounds up some of the best plugins, bundles, and tricks out there so you can pimp your TextMate and code like a real baller.
Before Starting
TextMate integrates really tightly with your environment and can run pretty much any unix executable you throw at it.
Lots of the plugins and bundles mentioned later will require you to install some new programs.
To do this quickly and painlessly, make sure you have the following installed:
Also, make sure you have /usr/local/bin in your TextMate PATH:
-
Go to the TextMate Menu > Preferences
-
Go to the Shell Variables section.
-
If there isn’t a variable named PATH already, create one (but there ought to be).
-
If PATH is empty, give it the value
/usr/local/bin. -
If PATH isn’t empty, append
:/usr/local/binto the end of it.
Bundles
TextMate allows developers to extend the editor’s understanding of its content through Bundles. To install a bundle, you only need to download it and double-click it. TextMate handles the rest.
JSHint
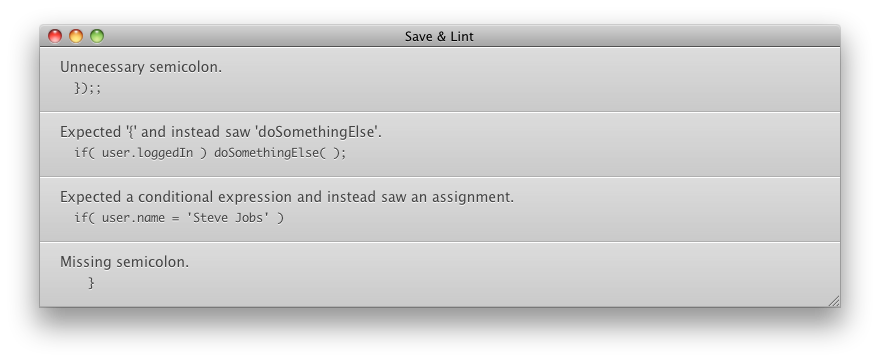
This awesome JSHint TextMate Bundle includes the JavaScript syntax tool, jshint, and can run it for you every time you save a file.
This is not only super helpful in keeping your scripts error-free, but is invaluable in keeping your sanity when it comes time to minify your scripts.
Dependencies:
- node.js:
brew install node
Installation:
-
Download the zip file and unpack it.
-
Rename the extracted folder to
jshint.tmbundle. -
Double-click the bundle to install it.
Usage:
-
By default, jshint is bound to ⌘S (Command-S), so every time you save your file it’ll get hinted automatically.
-
In the warnings window that pops up, click on a warning and your cursor will be placed at the offending character in your script.
Sparkup
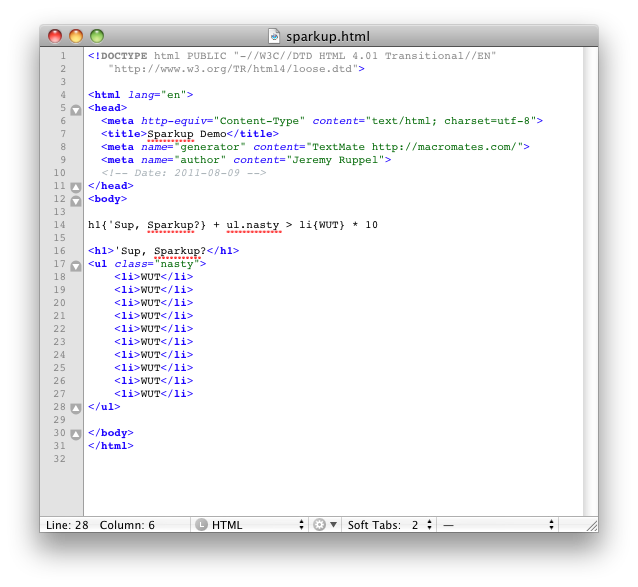
Sparkup is an awesome syntax for writing HTML hella fast using CSS selectors.
Dependencies:
- python (comes installed with Mac OSX)
Installation:
-
Download the latest version from the project’s downloads section and unpack it.
-
Double-click the bundle to install it.
Usage:
-
In almost any context, write your Sparkup line, then hit ⌤E (Control-E) to expand it into HTML.
-
All regular tags are expanded automatically, some with options:
h1➜<h1></h1> -
You can insert text into the node with curly braces ({}):
h1{Sup, Sparkup!}➜<h1>Sup, Sparkup?</h1> -
A dot (.) denotes a class name:
h1.yellow➜<h1 class="yellow"></h1> -
A hash (#) denotes an id:
h1#header➜<h1 id="header"></h1> -
You can combine classes and id’s:
h1#header.yellow.big➜<h1 class="yellow big" id="header"></h1> -
If you don’t specify the tag name, you get a div by default:
.item➜<div class="item"></div> -
Create sibling nodes with a plus (+):
h1{Sup} + h2{Sparkup?}➜<h1>Sup</h1><h2>Sparkup?</h2> -
Create child nodes with a carrot (>):
ul > li{Lists!}➜<ul><li>Lists!</li></ul> -
Multiply an item with a splat (*):
ul > li{Lists!} * 4➜<ul><li>Lists!</li><li>Lists!</li><li>Lists!</li><li>Lists!</li></ul>
AlignText
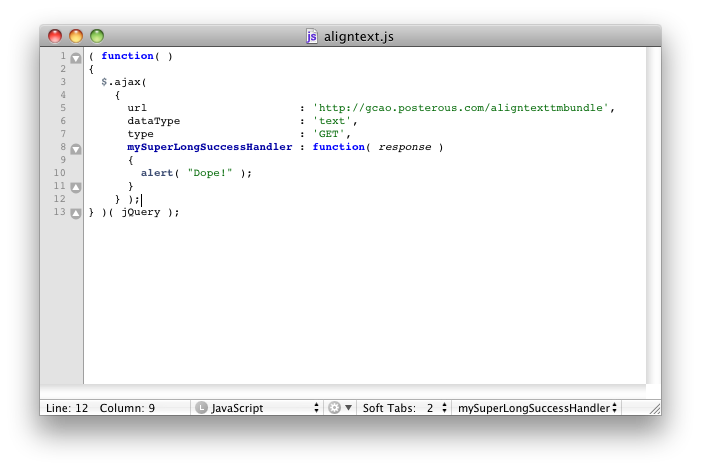
AlignText is an awesome bundle that provides one command for aligning your text vertically.
Dependencies:
- None!
Installation:
-
git clone https://github.com/gcao/AlignText.tmbundle.git -
Double-click the bundle to install.
Usage:
-
By default, the Align Text command is bound to ⌤⌥⌘] (Control-Option-Command-]).
-
In any context, select some text you want to align and use that key command.
-
You will be prompted for the character to align on. For example, if I have the code:
  ( function( )
  {
    $.ajax(
      {
        url: 'http://gcao.posterous.com/aligntexttmbundle',
        dataType  : 'text',
        type : 'GET',
        mySuperLongSuccessHandler : function( response )
        {
          alert( "Dope!" );
        }
      } );
  } )( jQuery );
… and I select the middle section and align on colon (:), I get:
  ( function( )
  {
    $.ajax(
      {
        url                       : 'http://gcao.posterous.com/aligntexttmbundle',
        dataType                  : 'text',
        type                      : 'GET',
        mySuperLongSuccessHandler : function( response )
        {
          alert( "Dope!" );
        }
      } );
  } )( jQuery );
… which is a LOT easier to read!
- If you ever want to align on more than one character, enter them both separated by three spaces.
Other Bundles
There are plenty of other bundles out there that don’t require much explanation. Here are some of the best:
-
ActionScript 3 Bundle
-
Ruby on Rails Bundle
-
SASS Bundle
-
HAML Bundle
-
Cucumber Bundle
Plugins
Much like Bundles, you can install TextMate Plugins simply by double-clicking them. Plugins alter the editor itself and can add additional windows, commands, and the like.
AckMate
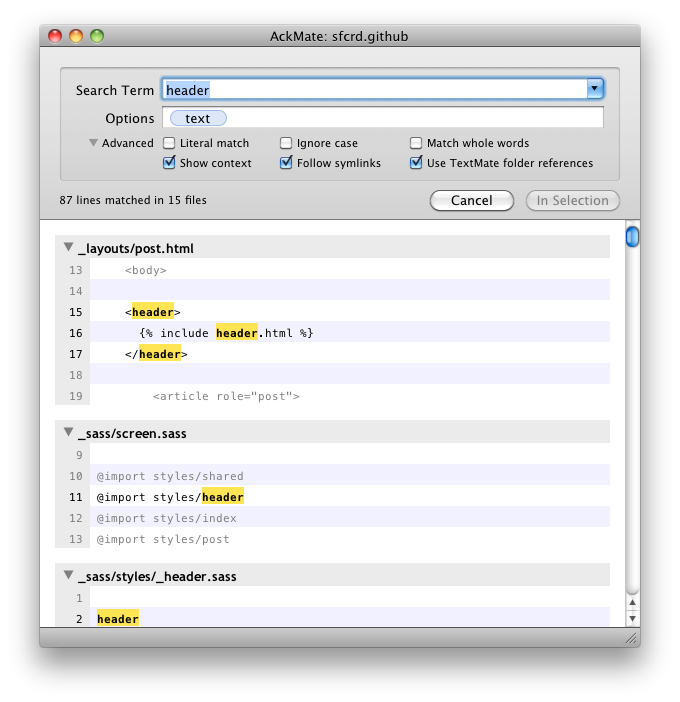
In really large projects, TextMate’s Find in Project becomes very slow, and slow search is not baller.
Enter AckMate, a super-slick plugin to provide an interface to ack, the blazing fast command-line search tool.
Dependencies:
-
ragel:
brew install ragel -
ack:
brew install ack
Installation:
-
Download the latest version from the project’s downloads section and unpack it.
-
Save any unsaved documents you have open in TextMate. The installation will restart the app.
-
Double-click the plugin to install it.
Usage:
-
By default, AckMate is bound to ⌤⌥⌘F (Control-Option-Command-F).
-
Part of what makes
ackso fast is that it can filter your search by file type. Use the options box to limit your search, or just use the tag text to search all text-based documents in your project.
ProjectPlus
Dependencies:
None!
Installation:
- Read the blog post by Ciaran Walsh here.
Usage:
- Installing the ProjectPlus plugin gives you SCM badges in your project drawer, among several other neat tweaks.
Tips & Tricks
TextMate is endlessly extensible. You can write your own commands in any language you’d like (bash, ruby, python, javascript, even PHP). You can also write your own snippets for any context.
Here are some other tips and tricks for getting the most out of your editor.
Color Picker in CSS context
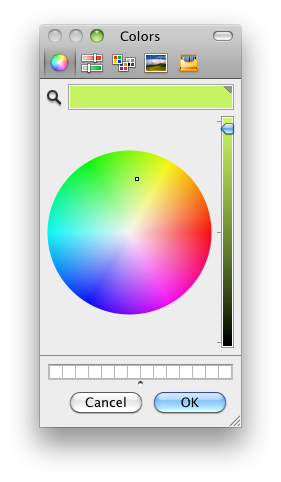
When you’re writing CSS and you want your colors to be exact, you can’t beat a color picker.
Hit ⇧⌘C (Shift-Command-C) to bring it up, then use the magnifying glass to pick up colors right out of your comps!
Quick Search
A little-known command for Find in Document, better than ⌘F, is ⌤S (Control-S). Hit that combo to pop open a small text field at the bottom of your window. Begin typing there and your entry will highlight in the document. Hit the combo again to move to the next occurrence of your entry.
Spell-Check
Hit ⌘: (Command-:) to cycle through possibly misspelled words in your document. Then, hit ⌘⌥: (Command-Shift-:) to bring up a dictionary control.
Open Terminal to your project directory
Highlight a file in your project drawer and hit ⌤⌥O (Control-Shift-O) to open a new Terminal window, located where your selected file lives.